Manage Engine Installation
The installation process involves two main steps:
- Deploy the Cyberhaven MDM Configuration Profile
- Upload and deploy the macOS Sensor installer
Step 1: Deploy the Cyberhaven MDM Configuration Profile
- Log in to Endpoint Central with permissions to create configurations.
- From the top menu bar, select Configurations.
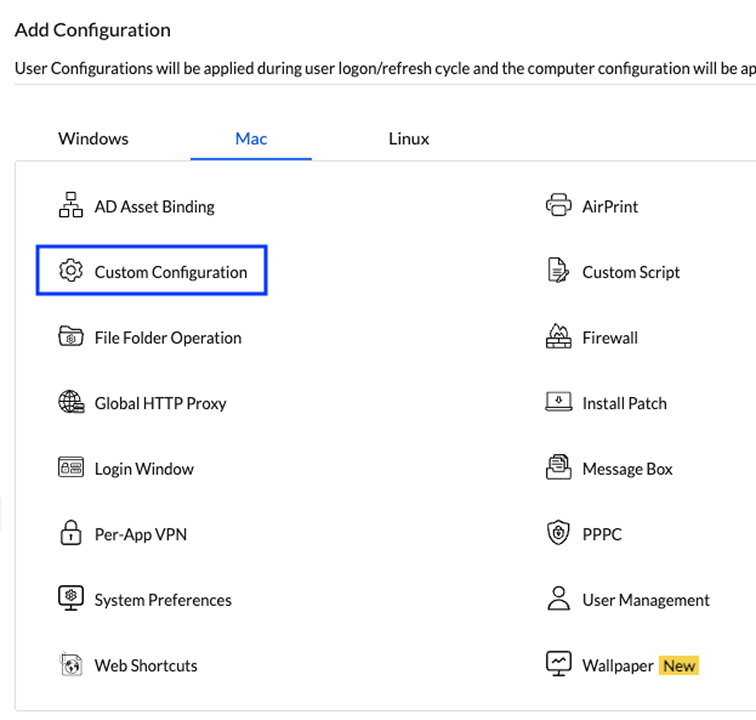
- Navigate to Configuration > Mac > Custom Configuration.
- Enter an appropriate name and optional description.
- Under Custom Configuration Profile, drag and drop or upload the mobileconfig file.
- Define the target machines for deployment.
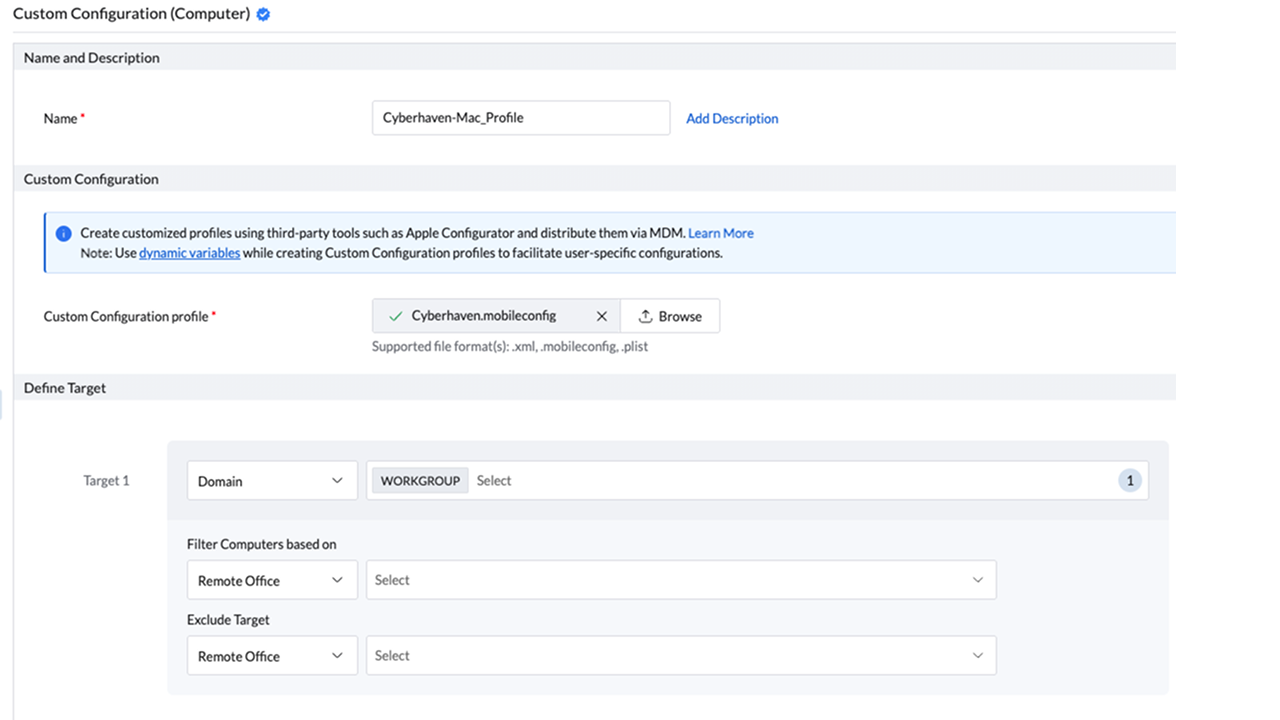
- Click Deploy or Deploy Immediately.
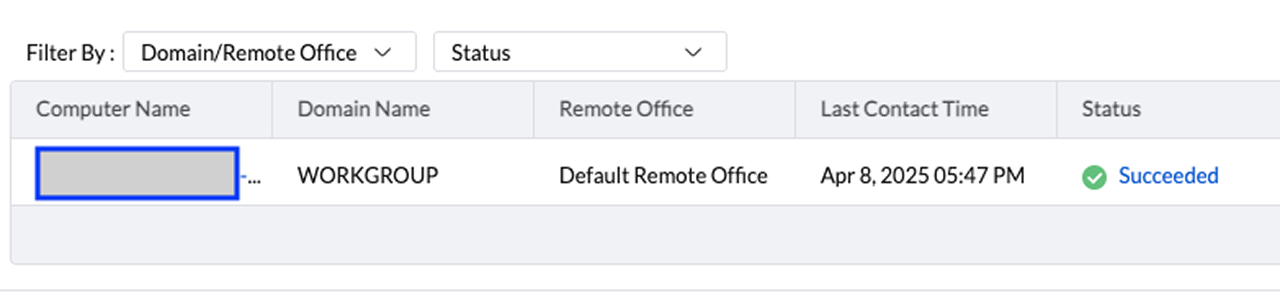
- Verify that the profile status is Succeeded.
Step 2: Deploy the macOS Sensor
- In the Endpoint Central console, go to Software Deployment from the menu bar.
- Navigate to Package Creation > Packages.
- Click Add Package > Mac.
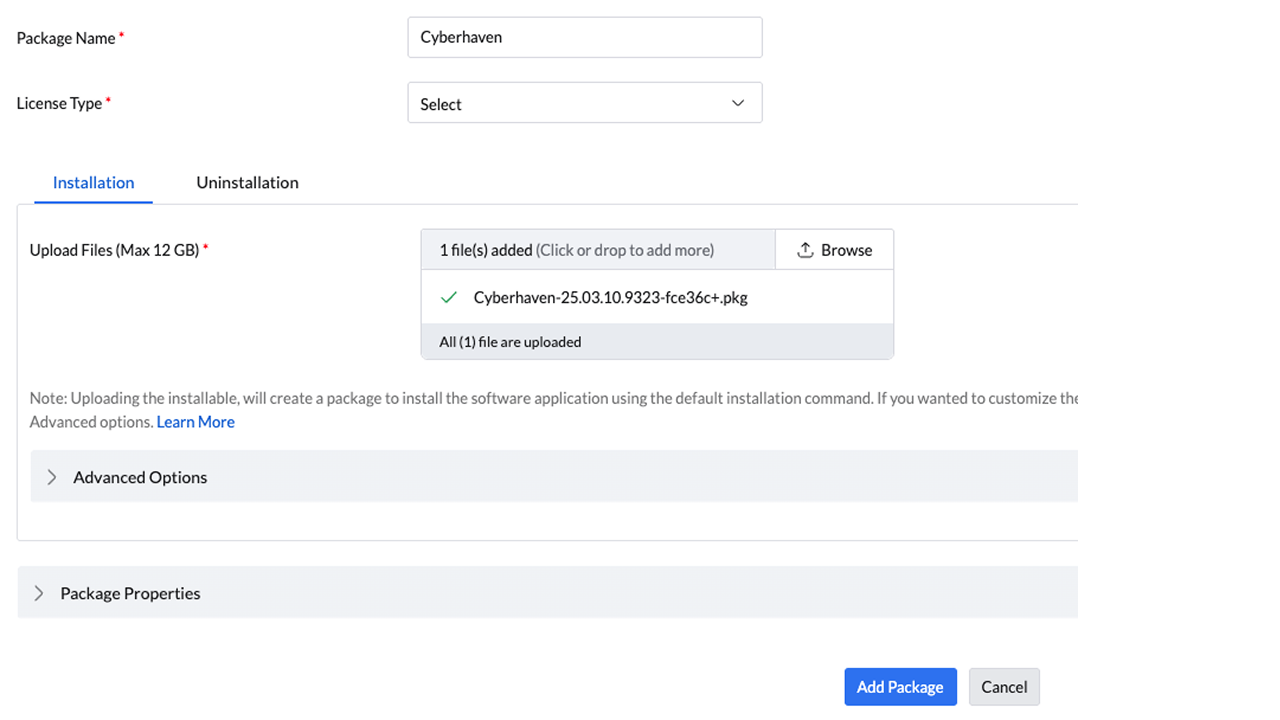
- Provide a unique name.
- Set License Type to Commercial.
- In the Installation section, upload the Cyberhaven installer.
- Click Add Package.
- In the Deployment section, select Install/Uninstall Software > Mac > Computer Configuration.
- Provide a unique name and optional description.
- For Operation Type, select Install and choose the package created earlier.
- Apply the appropriate Deployment Policy.
- Define the appropriate Target.
- Click Deploy or Deploy Immediately.
- Verify the Execution Status is Succeeded.
Known Issue: VPN Configuration Prompt
Some MDM solutions may prompt for a VPN hostname when uploading the Cyberhaven MDM profile (version 2.0.8 or later), due to the inclusion of inline proxy support for Microsoft Teams traffic inspection. If prompted, enter 127.0.0.1 as the VPN hostname to proceed with the upload. For details about Microsoft Teams support, see Microsoft Teams Support with Windows and macOS Sensors